
Create and set up your Discord bot, step by step
Create the bot in the Discord portal, set its options, invite it to your server and connect it to Agora.
Updated on Oct 4, 2026, 5:45 p.m.
On this page
In short. The bot is optional: it is an automated account that gives your groups' Discord roles and sends direct messages (application decided…). Simplest is to create it in the same Discord application as your members' sign-in. Allow 5 minutes.
Before you start #
- The getting-started setup is done: your Discord application (Agora's identity at Discord) already exists.
- You have the Manage Server permission on your Discord server, to invite the bot there.
- You are an administrator of the Hub (your Agora site), to paste the token in step 7.
- A word stops you (token, intent, server ID…)? It is explained in the glossary.
1. Open your application #
- Go to https://discord.com/developers/applications and sign in.
- Open the application created when you set up Agora (the one used for Discord sign-in). Putting the bot there too is simplest; a separate application works as well: New Application, give it a name, accept the terms and Create.
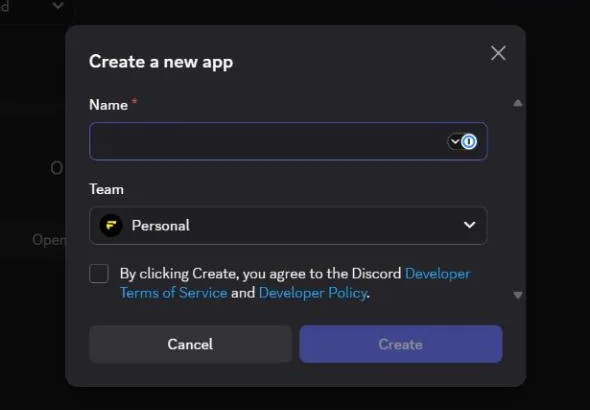
Shortcut to the Bot tab. Once your application is open, its address looks like
https://discord.com/developers/applications/123456789012345678/bot: the long number is the application ID (the Client ID, the same one as in Administration → Configuration → Discord connection, block Discord login (OAuth)). Replace it with yours, or keep the address from step 1 and click your application: the result is the same. This address requires being signed in to Discord.
2. Set up the bot (Bot tab) #
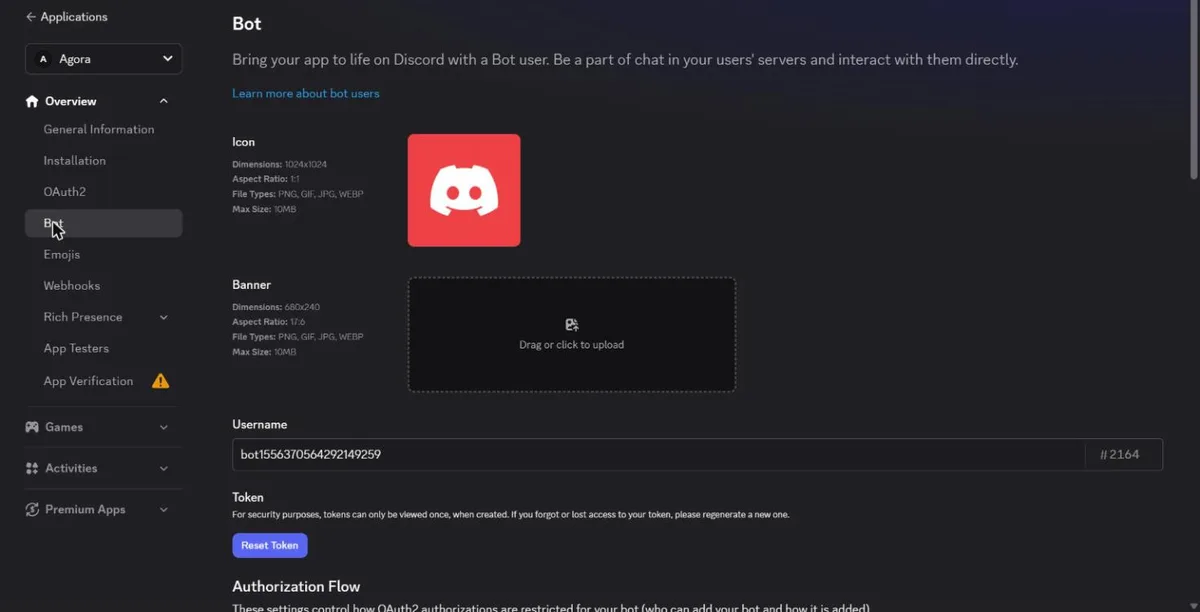
| Option | Setting | Why |
|---|---|---|
| Username / icon | Your choice | The name your members will see in Discord. |
| Public Bot | Off | Nobody but you can invite your bot to their server. |
| Requires OAuth2 Code Grant | Off | Otherwise the invite in step 4 fails. |
| Presence Intent | Off | Agora does not need it. |
| Server Members Intent | On | The bot must see server members to give them their roles, and to follow role changes made in Discord (Sync Discord → Agora). Without it, Agora falls back to the audit log (the bot's role then needs View Audit Log). |
| Message Content Intent | Off | Agora does not read messages. |
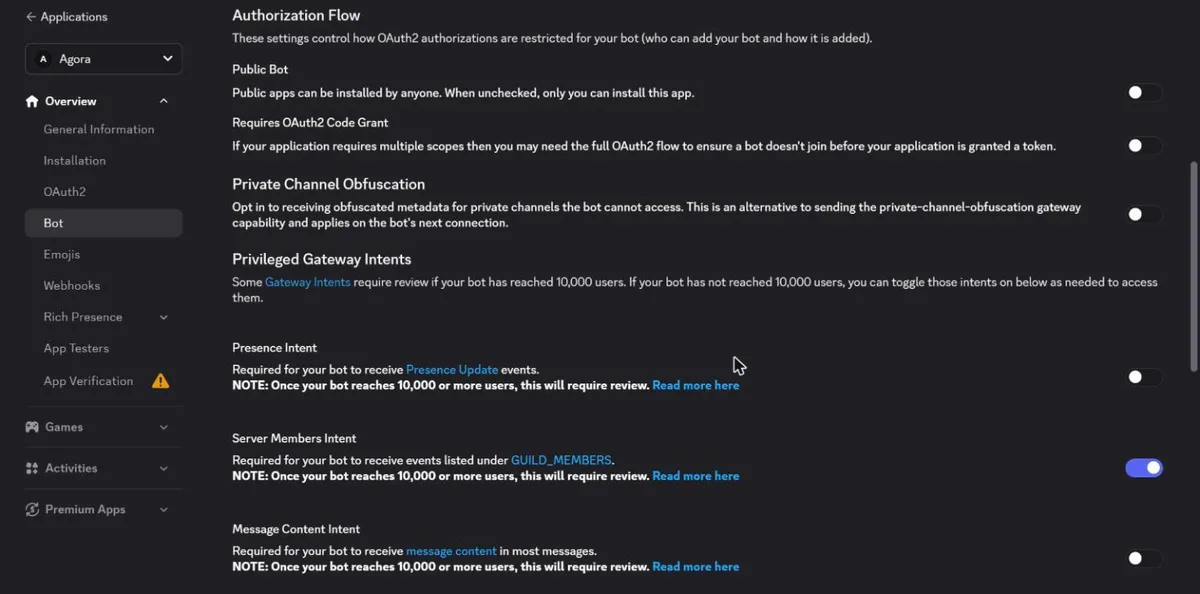
Click Save Changes in the bar that appears at the bottom of the page.
3. Copy the bot token #
- Still in Bot, click Reset Token and confirm.
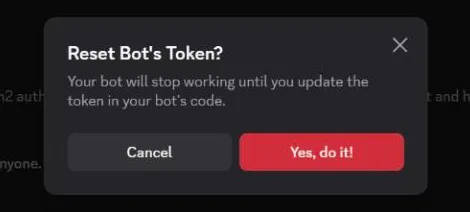
- Copy the token shown (Copy button): it is shown only once.
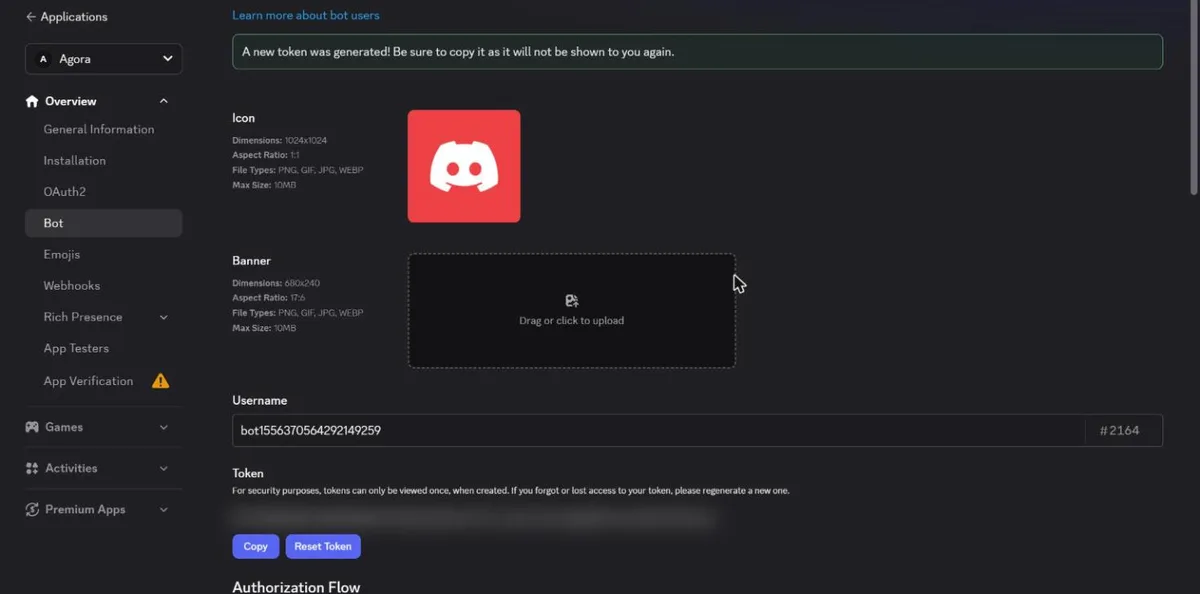
The token is a password. Paste it nowhere but in Agora and never send it to anyone (not even support). If it leaked: Reset Token, then paste the new one in Agora; the old one stops working immediately.
4. Invite the bot to your server #
- OAuth2 → URL Generator tab.
- Scopes: tick
bot.
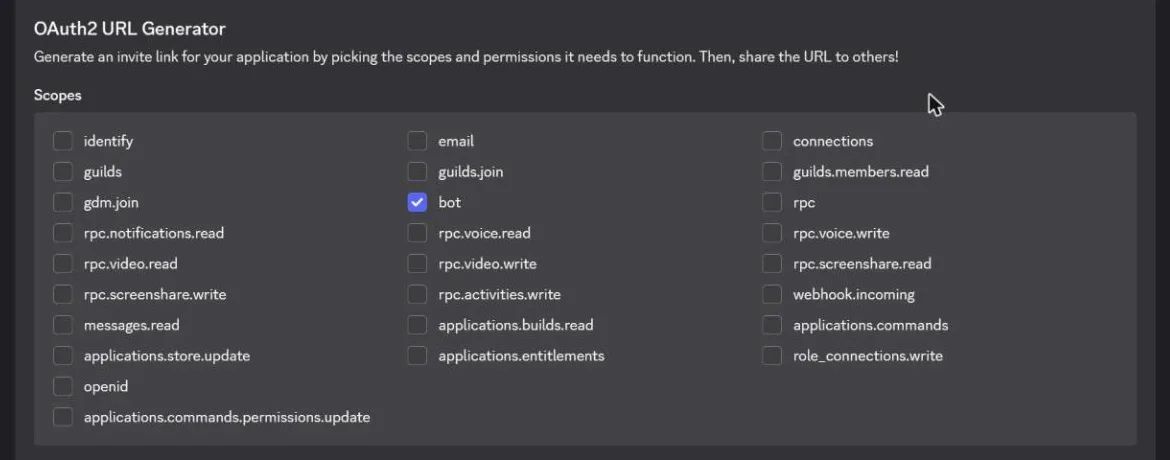
- Bot Permissions: tick Manage Roles. Nothing else is needed.
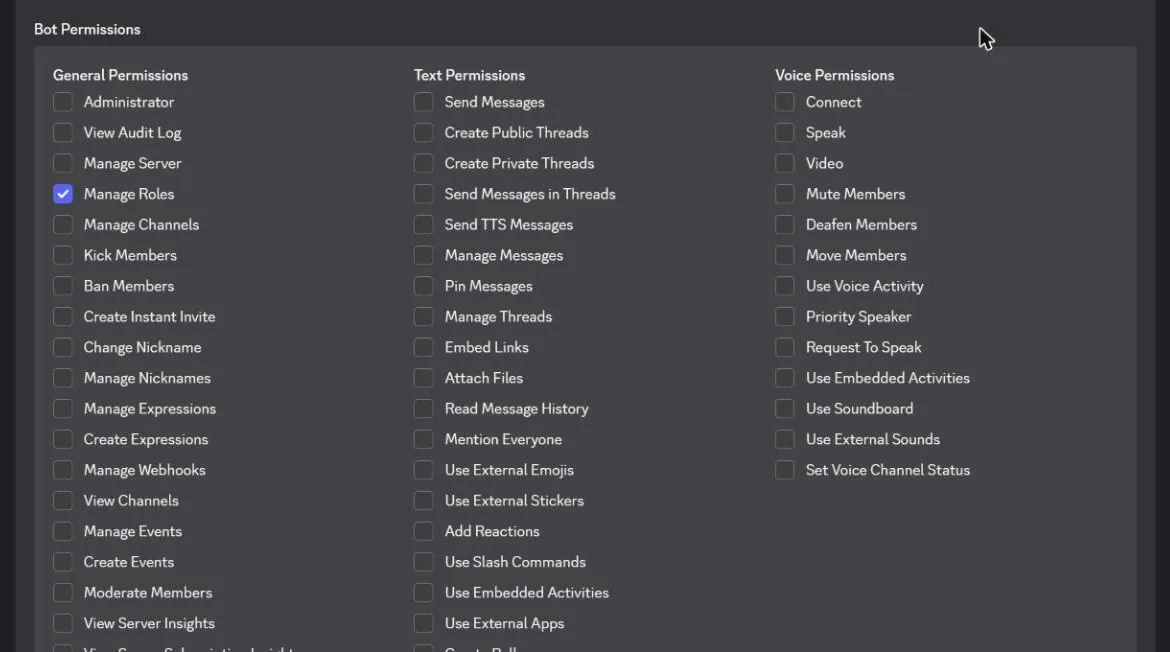
- Integration Type: Guild Install. Copy the generated URL at the bottom and open it.

- Pick your server and Continue. You need the Manage Server permission on that server.
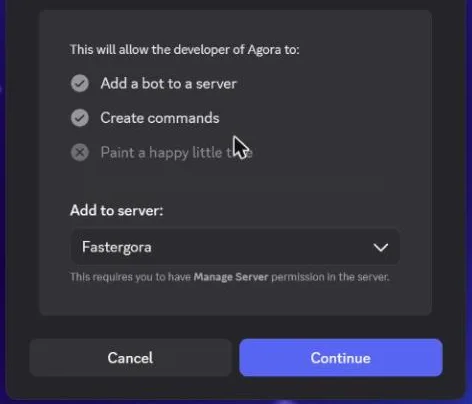
- Check that Manage Roles is ticked, then Authorize.
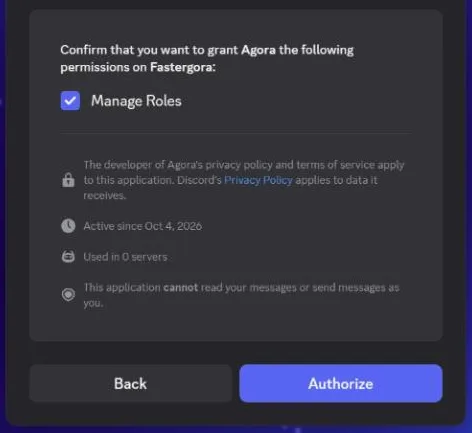
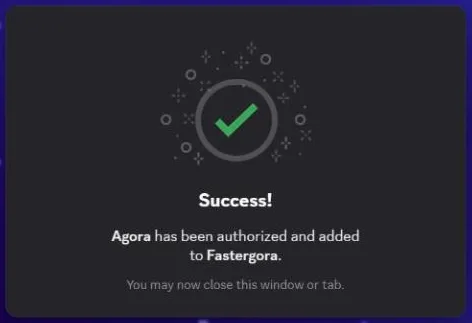
The MDT can link each department (police, EMS…) to its own Discord server: invite the bot to each of those servers with the same URL.
5. Put the bot's role high enough #
In Discord: Server Settings → Roles, drag the bot's role above every role it must give. A bot can never give a role placed higher than its own, or at the same rank.
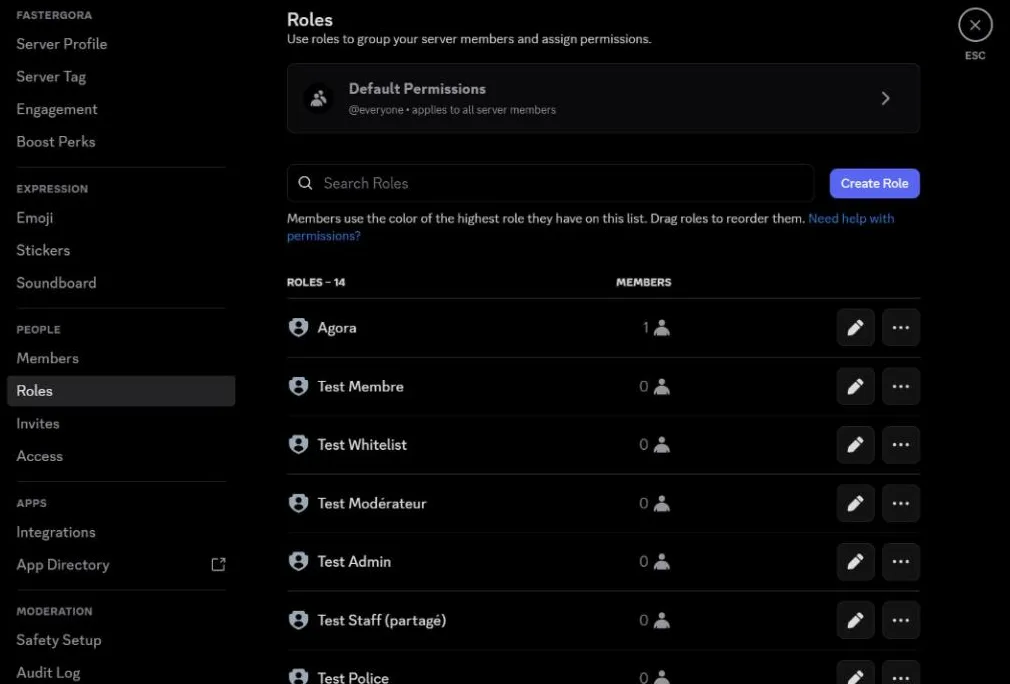
Agora checks this for you: a role that is too high is greyed out in the lists, with the reason, and refused on save. If you reorder roles later, a mapping that became impossible shows in red in Administration → Configuration → Discord connection, under Mappings Discord will refuse.
6. Copy the server ID #
- Discord → User Settings → Advanced (Developer in recent versions) → turn on Developer Mode.
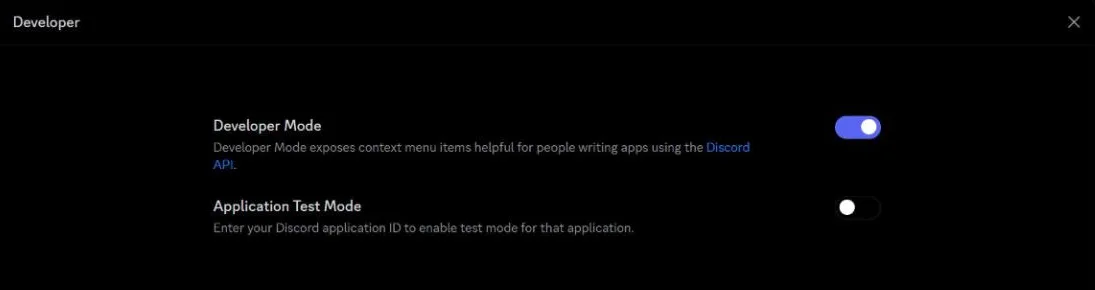
- Right-click your server → Copy Server ID.
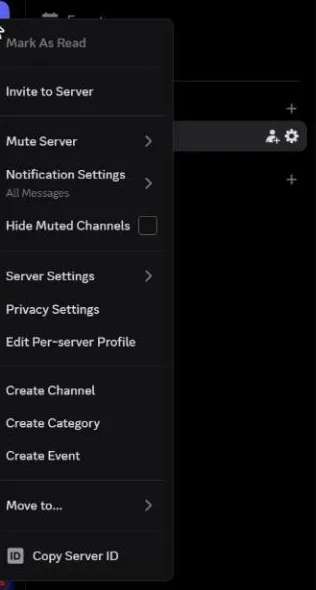
Discord's official help covers this step: Where can I find my User/Server/Message ID?.
Tip, desktop app only. With this ID, you can paste
discord://-/guilds/ID/settings/rolesinto your browser's address bar (replacingIDwith the server ID) to open Server Settings → Roles from step 5 directly. It is an unofficial shortcut: it may stop working, and the menu path always works. To understand role hierarchy, see Discord Roles and Permissions.
7. Connect the bot to Agora #
- Administration → Configuration → Discord connection, block Discord bot (roles + messages).
- Paste the Bot token and the Server (guild) ID, then Save.
- The banner turns to "● Bot connected: name on server · N role(s) visible". The token stays hidden ("configured"): leave the field empty to keep it.
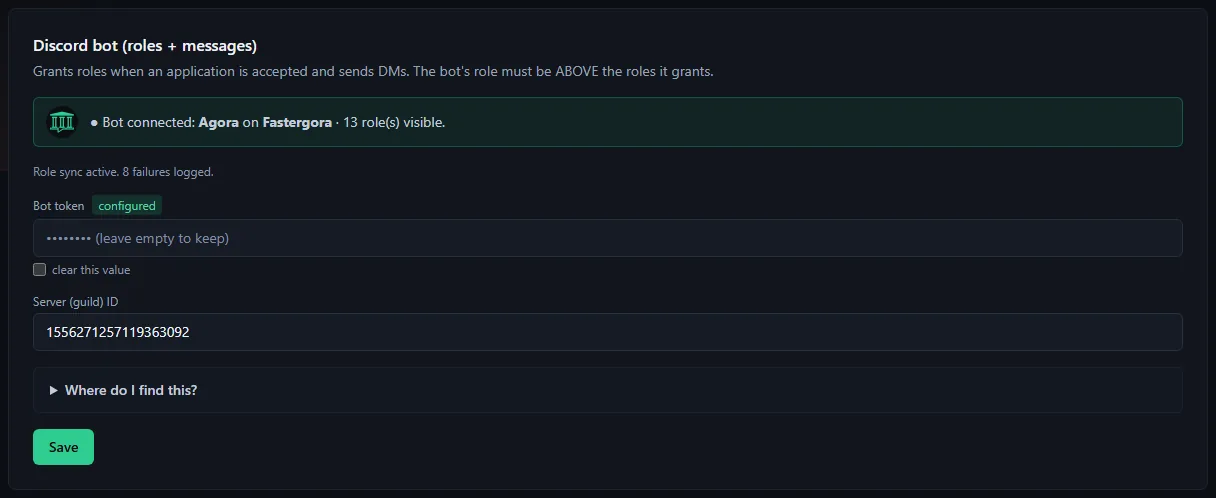
- Click Test: Agora checks the token, the server and what Discord would refuse on the next sync, without changing anything on Discord.

Then link each site role to a Discord role in Discord roles linked to roles: see Connect Discord to Agora: sign-in, bot and roles.
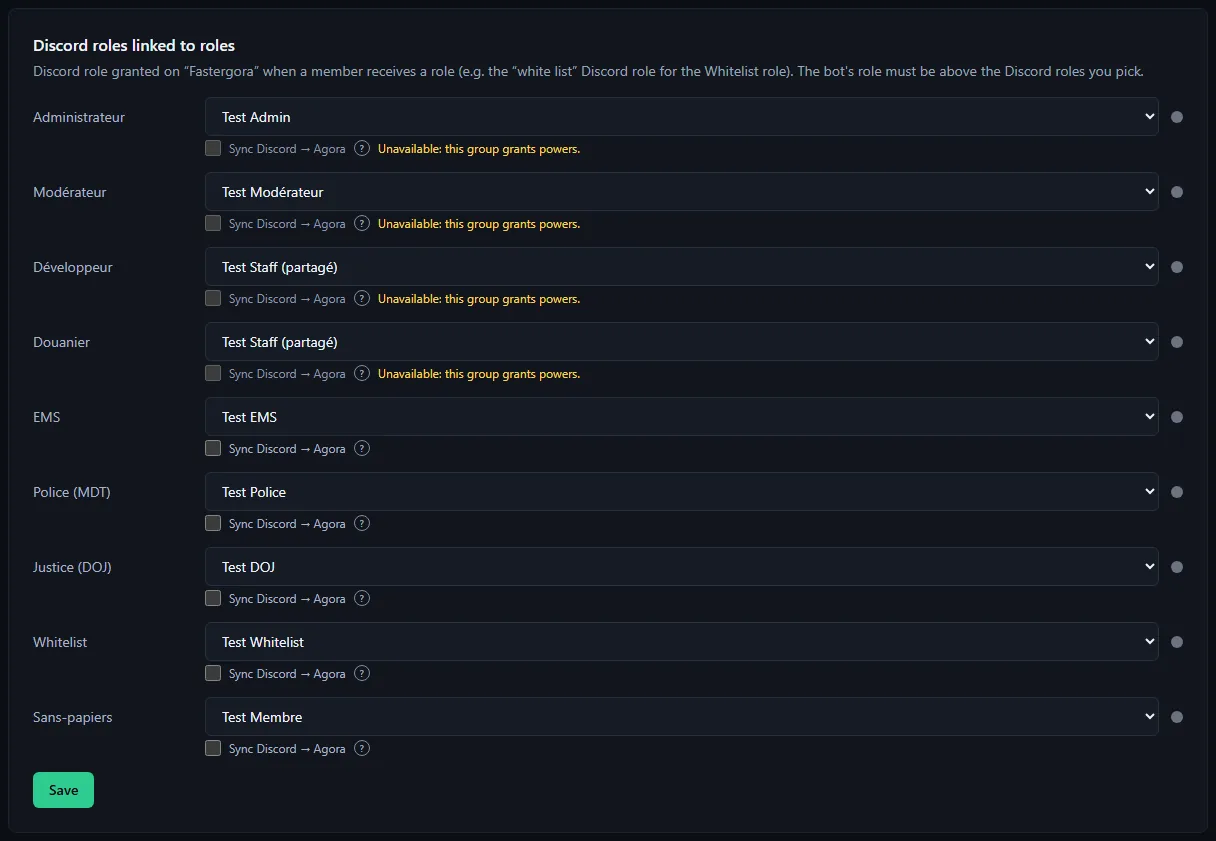
You know it worked when… #
- The banner shows "● Bot connected: …" and the Test button reports no problem.
- When an application is decided, the applicant receives a private message from the bot (if their private messages are open).
<!-- CAPTURE C-029 -->
If it does not work #
- "Bot not connected": token copied wrong (extra space) or reset since. Redo step 3.
- The bot is not on the server: the invite URL from step 4 was not confirmed, or Requires OAuth2 Code Grant is on.
- A role is not given: the bot's role is too low (step 5) or the Manage Roles permission is missing. See Missing Discord permission.
Go further #
- Synchronization the other way (Discord to Agora) and the Suspended member setting: Discord roles, sync and "Suspended member".
Was this article helpful?
Related articles
- Connect Discord to Agora: sign-in, bot and rolesDiscord sign-in is mandatory; the bot, optional, assigns your groups' Discord roles and sends private messages.
- Discord: role not given, missing permission, bot role too lowWhen a role does not arrive, it is almost always the bot's role sitting below the role to give, or the Manage Roles permission missing.
- Discord roles, sync and "Suspended member"Each group can carry a Discord role, set and removed automatically (or, if you prefer, Discord is the source of truth); the Suspended member setting decides what happens to roles during a suspension.
- Glossary: Agora's technical words, explained simplyHub, panel, egg, Docker, PostgreSQL, framework, lease: every technical word in the documentation defined in a sentence or two, by topic.